Design Overview
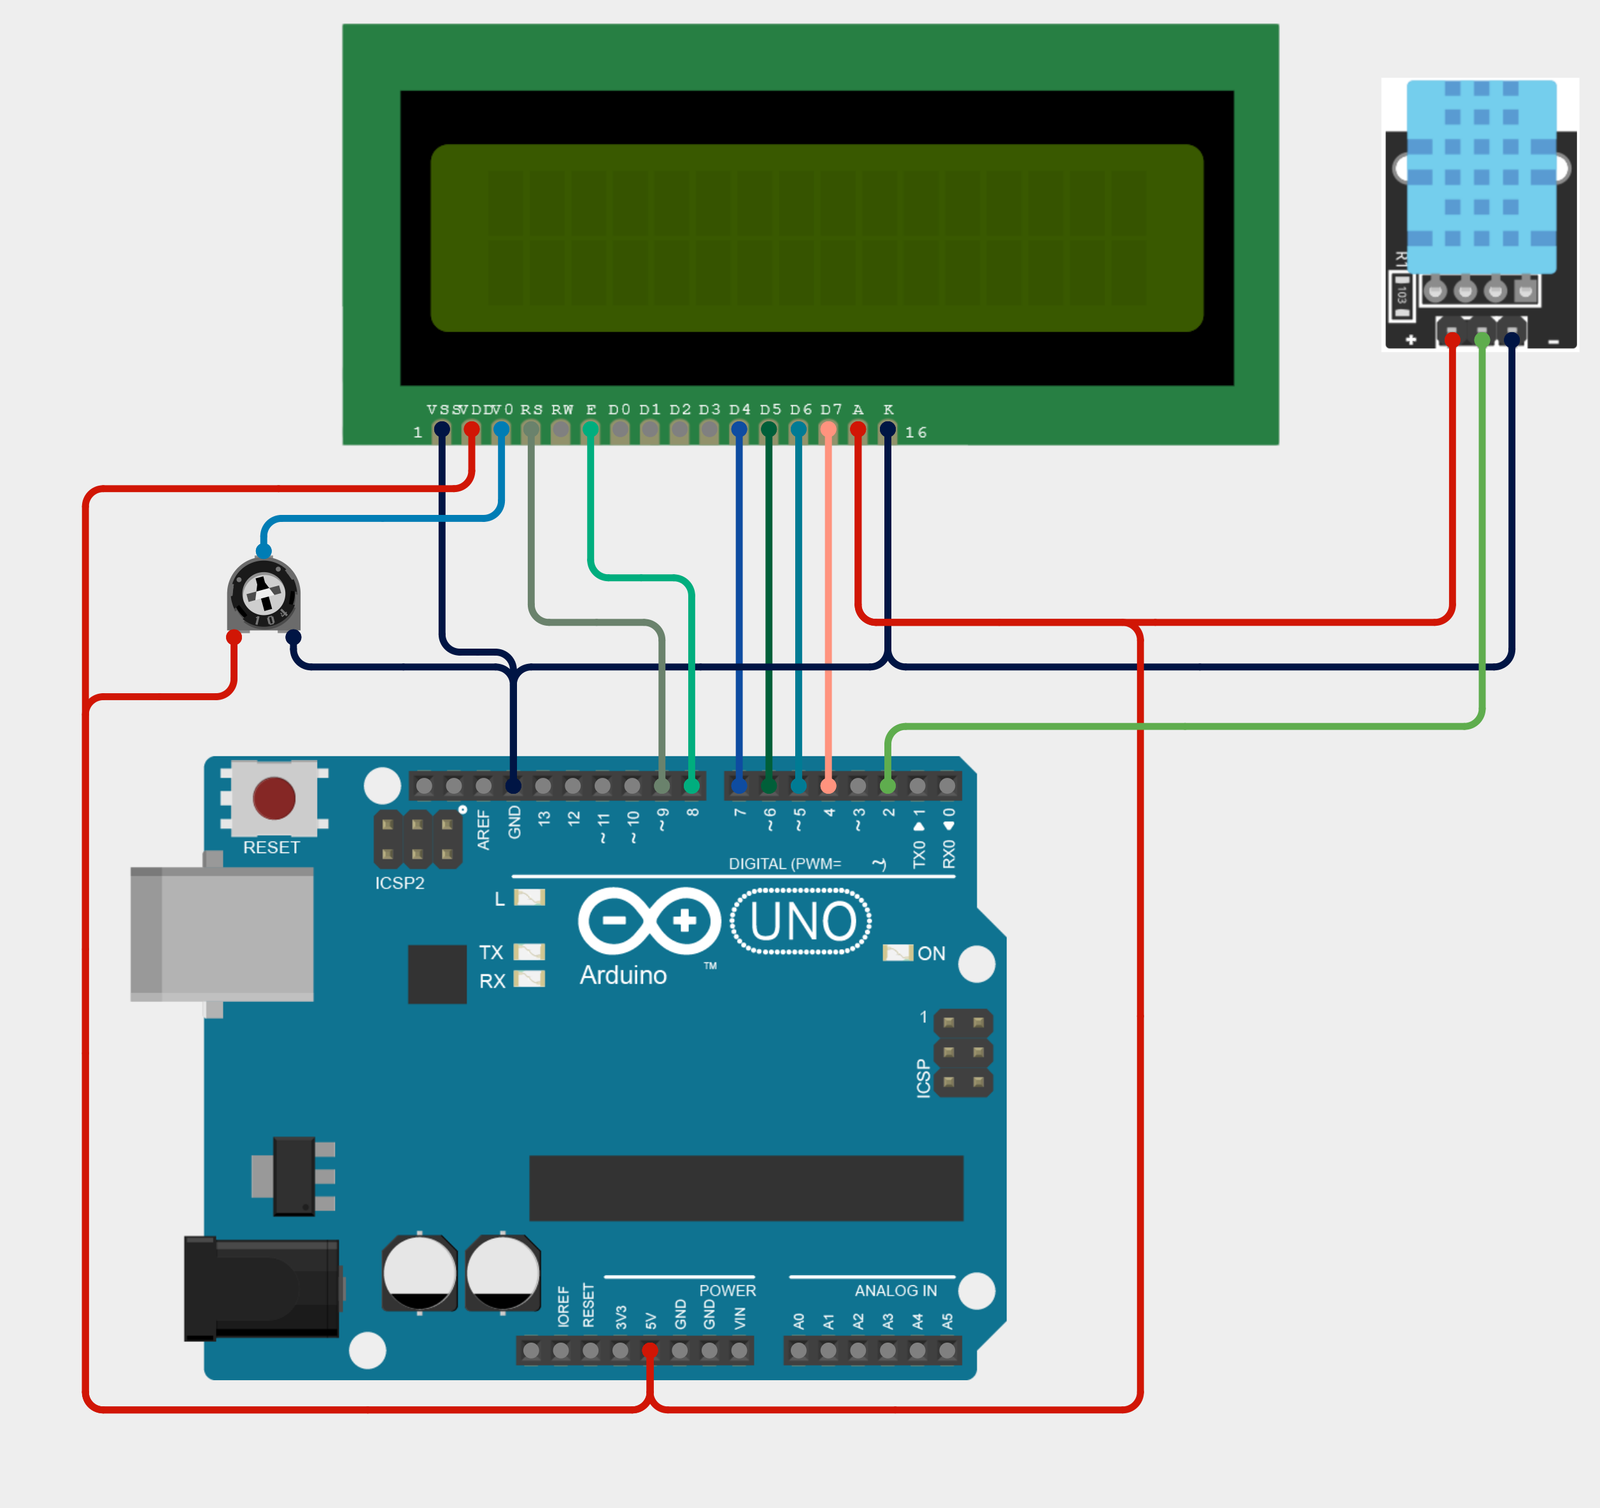
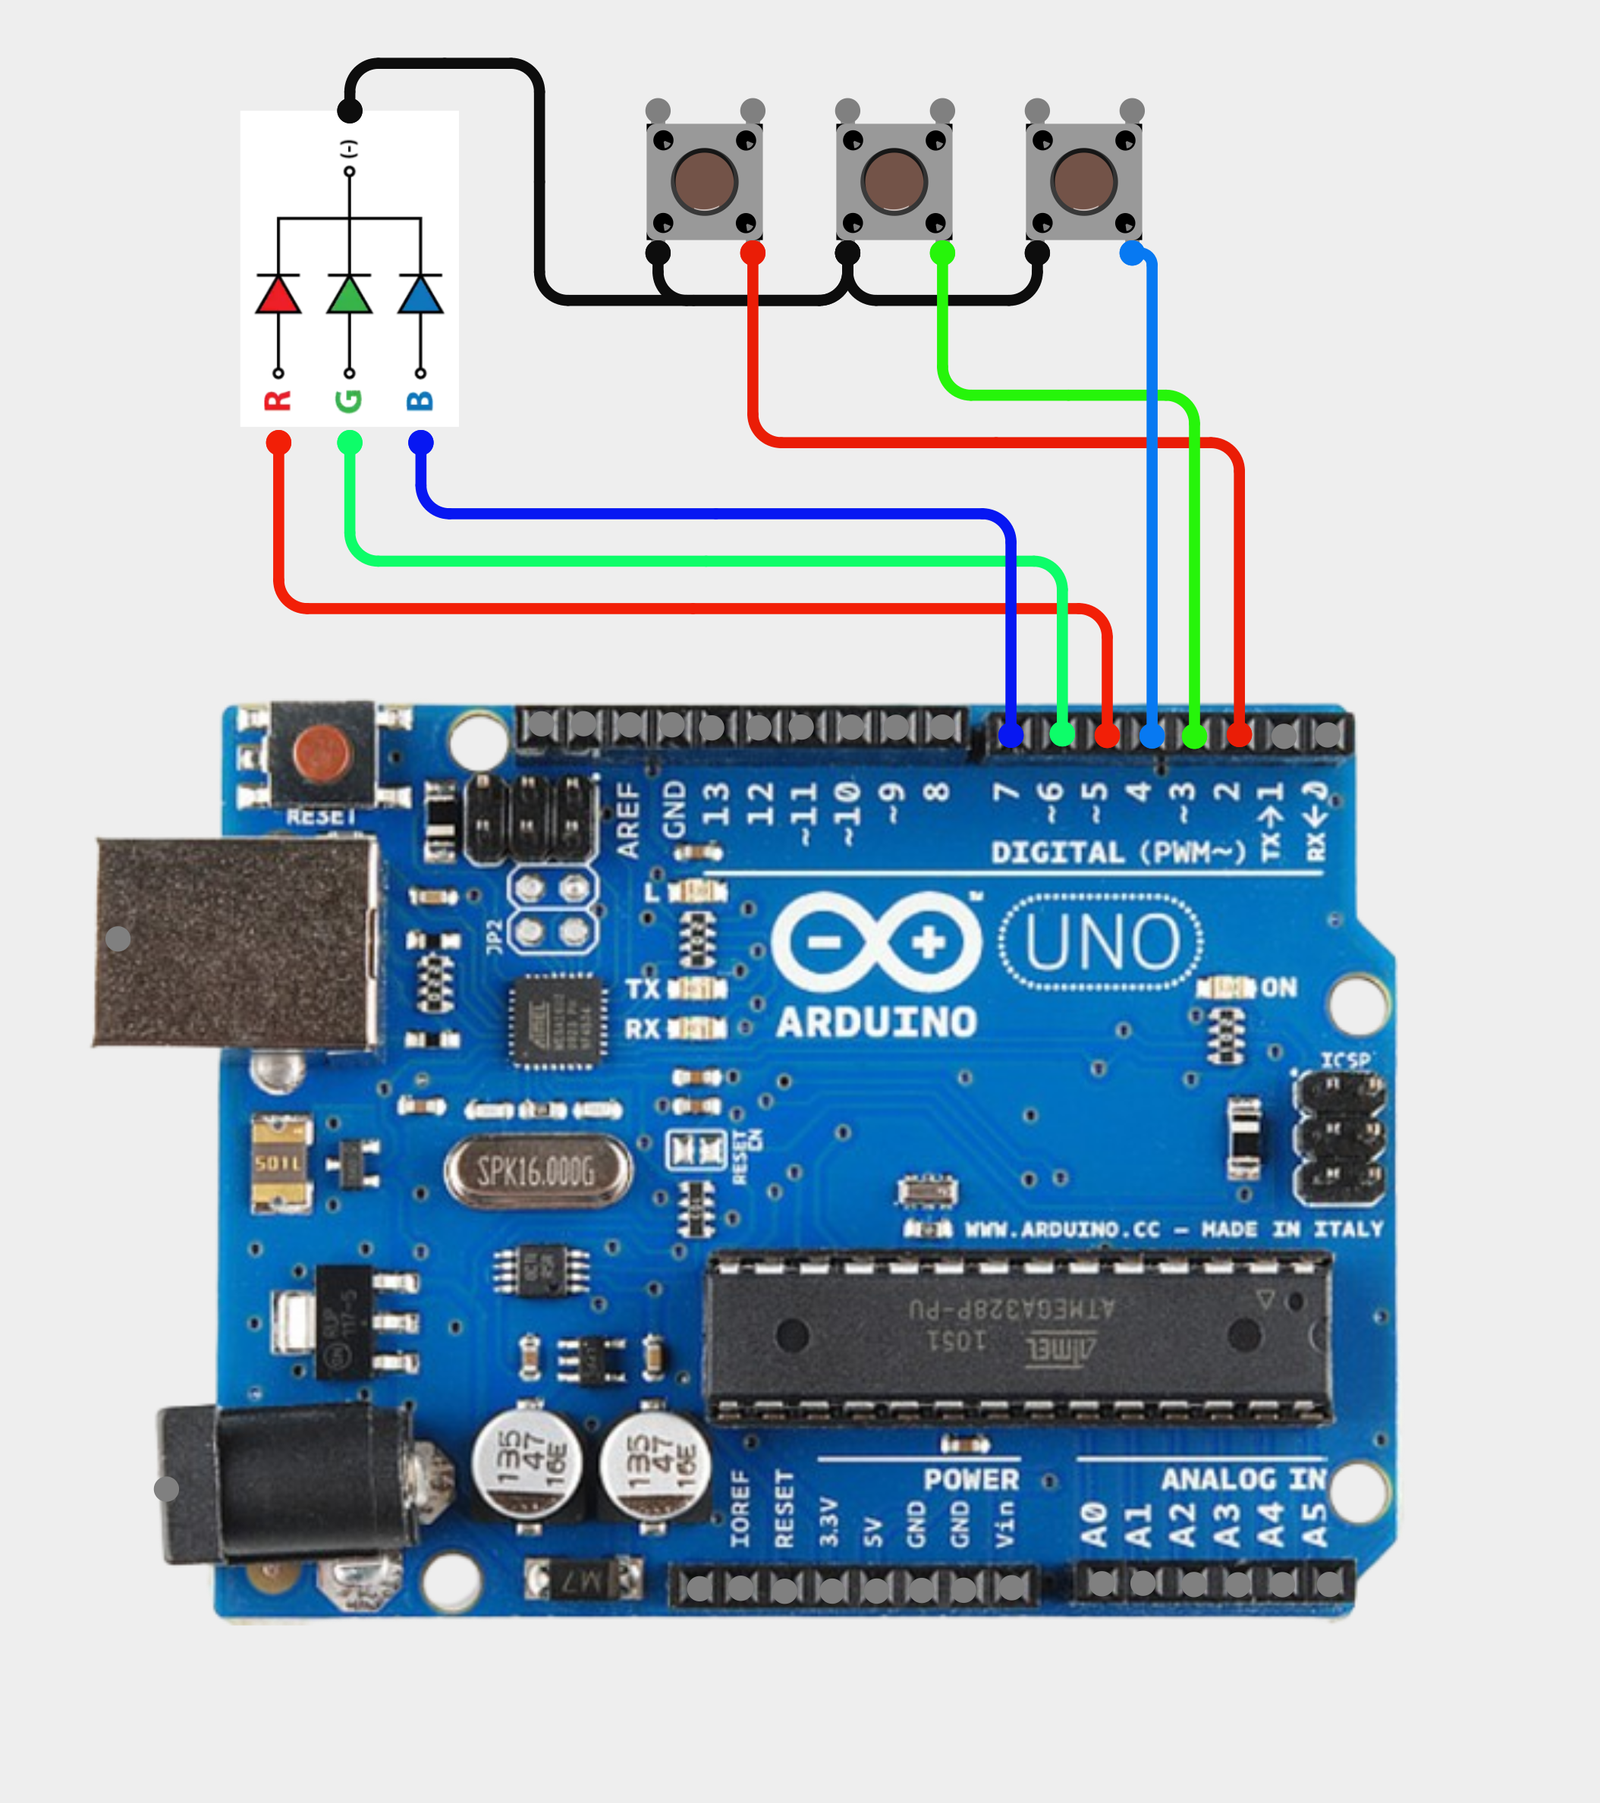
The Arduino UNO in this circuit has the following pin connections and purposes:
These connections allow the Arduino UNO to read the analog voltage from the potentiometer, which can be used for various applications such as adjusting input values or controlling other components.
Code (Tested with Arduino Uno)
const int TrimmerPot = A0; // Arduino Pin A0 (Analogue) = Potentiometer
int TrimmerPotValue;
void setup() {
Serial.begin(9600); //TX-RX serial communication with Arduino (9600 baudrate)
}
void loop() {
TrimmerPotValue = analogRead(TrimmerPot); // Read analgue value from trim potentiometer
// Convert the reading (which goes from 0 - 1023) to a voltage (0 - 5V):
float voltage = TrimmerPotValue * (5.0 / 1023.0);
// Print out the value in volts
Serial.print("Voltage Value: ");
Serial.print(voltage);
Serial.println(" V");
// Delay
delay(500);
}